TL1000


operated by MaverickMachines.us

TL Common Questions

TL Modifications

Manuals & Downloads

Contact

Useful Links


TL1000R

Stock Exhaust Mod


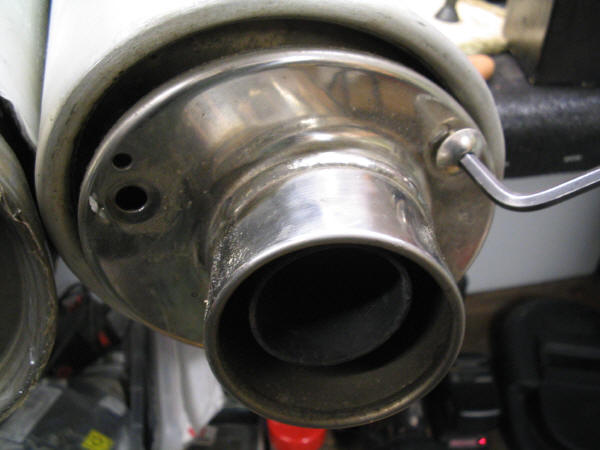
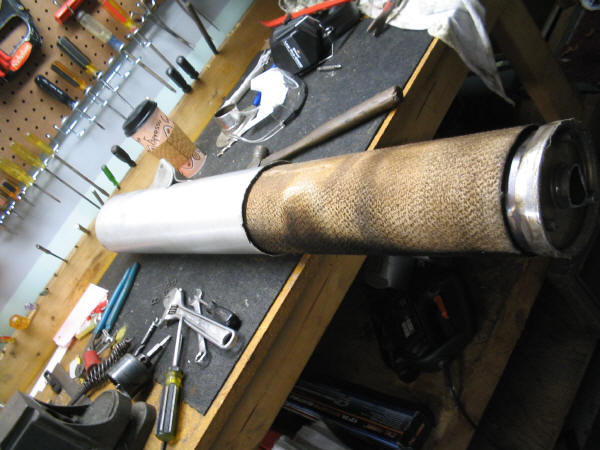
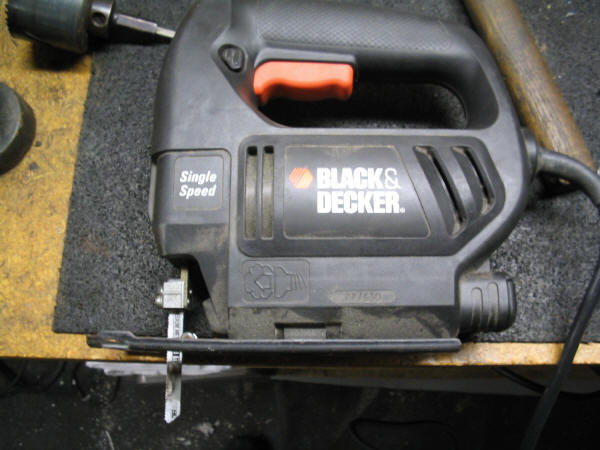
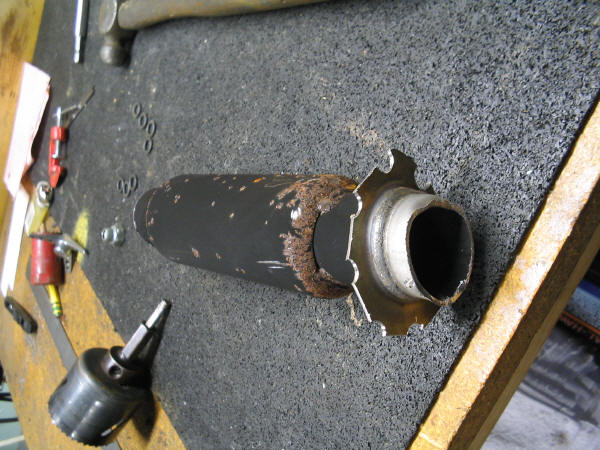
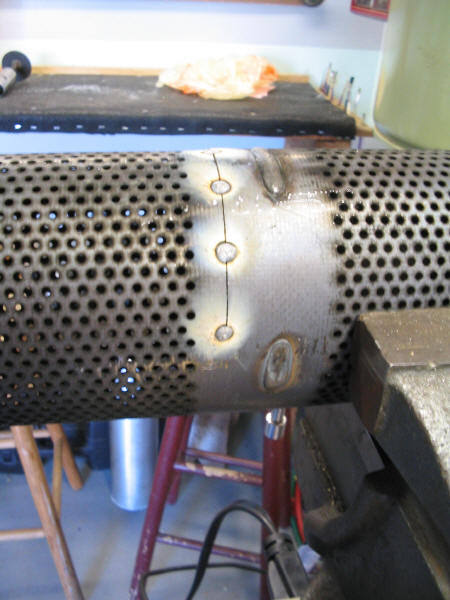
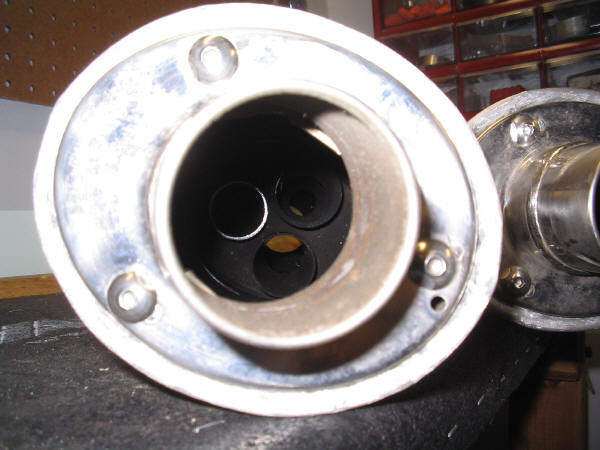
When I bought the bike it came with Yoshimura RS3 racing bolt-ons. It sounded great and gave great performance but when I would ride with my dad I could barely hear when to shift. He has a Harley with shotguns. With the RS3s there is basically a clear path through the exhaust  about the same diameter as the exhaust pipe itself. This straight shot through the can is surrounded by a steel mesh with dampening material behind it.  This allows for each exhaust "puff" to de-pressurize inside the can making it barely legal and with little restriction.  OK so maybe it was a bit too loud to be legal.

I decided I would modify the stock cans to my liking.  The result was a bit louder than the RS3s with more of a growl coming through in the tone. Legal at idle, revving will probably get me a ticket. I am very happy with the result...

Video of 6K rev -The mic on the cam was overdriven (it was too loud for the mic) so it sound more muffled than in person

I saw a how-to that took the guy 3 days. This how-to takes about 1.5 hours without paint time.

Tools Required:

Hand Grinder -cutting wheel Drill + 1/4" or 3/8" bit Crowbar
Flat Screwdriver Hack Saw/ Band Saw Metric Allen Wrenches
Jigsaw w/ Metal blade Adjustable wrench Rubber/ Nylon hammer
Welder (optional) Wrenches to bolt the cans on  

Step 1

With a cutting wheel carefully grind the welds that lock the bolts in place.

Step 2

Cut that stupid pipe off the front. Careful not to mar the rolled edge. You will F it up enough later...

Step 3

Open the rolled edge. Pry against the left overs of the pipe you cut off. Once you have part of the lip unrolled use a flat screwdriver to work the rest of the lip open.

Step 4

Use an adjustable wrench to open that lip open all the way so the guts will come out.

Step 5

You will need to use a lead or rubber mallet on the bolts to help work the guts out. If you are really crafty you can use a slide hammer. Cut off that useless baffle material.

Step 6

Drill holes in the stainless steel. If you have a torch -use it and cut a hole. I don't have gas in mine so I drilled. Don't be a fag and try a holesaw -it is stainless and will take the rest of your life...

Step 6

Drill more holes in the stainless steel

Step 6-2

Use a metal blade on a jigsaw and cut from hole to hole. Yes I realize this is hacked and no I didn't care -you can't see it in the final product.

This is a jigsaw

Poor mans torch

Step 7

Cut the inside pipe by cutting through the whole exhaust. Hold the guts up to the light and you will see that the inside pipe is closer to one side -cut on that side so that you cut as little of the exterior as possible. DO NOT cut it completely in half! When you have cut the pipe it will come out.

Step 7

The pipe

Put her back

Now we start to put this can back together. If you have a welder -button up this cut. If not then don't worry about it, just proceed.

Step 8

OK so I got carried away and missed a few steps. You want to slide the guts back into the can without the baffle material. MAKE SURE THE GUTS ARE NOT UPSIDE DOWN! Make sure that the turndown cap turns down when it is all together. A quick way to check is to look at the writing on the side of the can -should not be upside down and the single bolt goes downward. Use a non damging mallet to work the guts back in. Use the nuts and tighten the guts into place. Use a ballpeen/ bodyshop hammer to hammer the rolled edge back into place. I also painted the can with high heat ceramic engine paint.

Final Result!

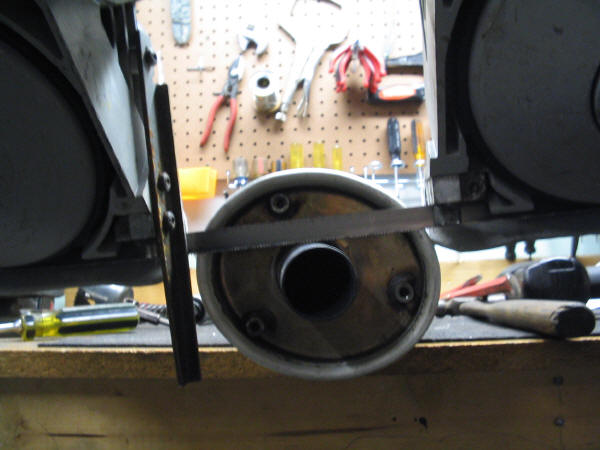
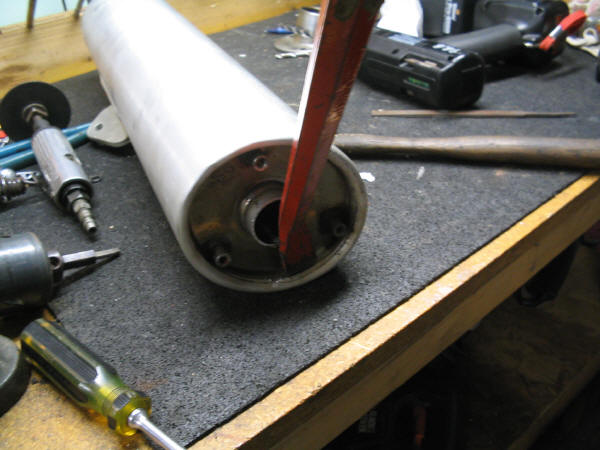
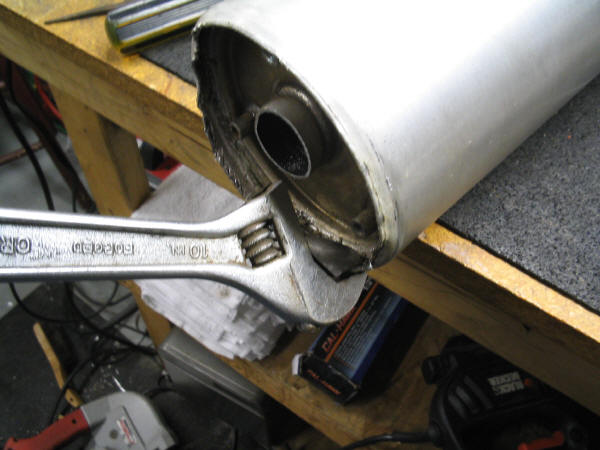
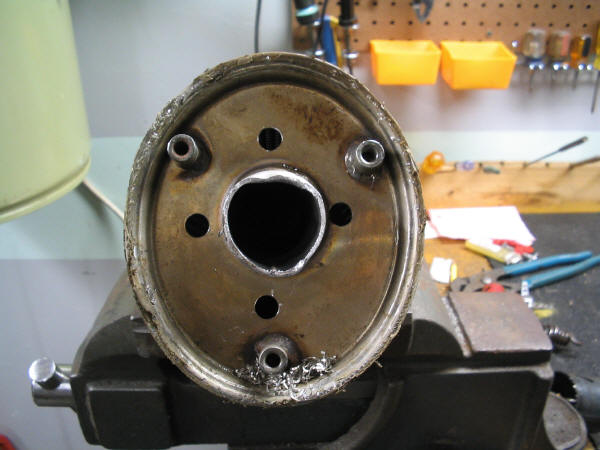
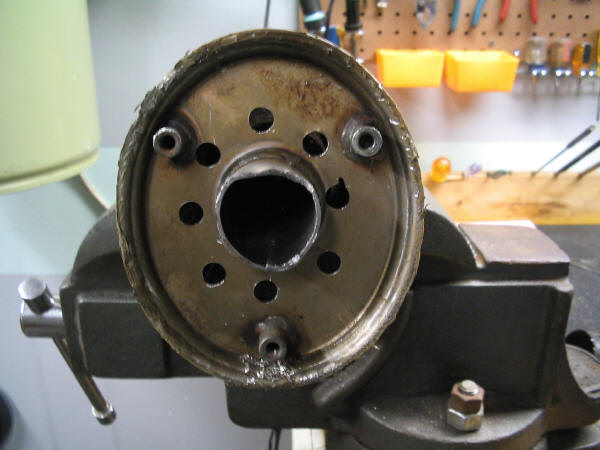
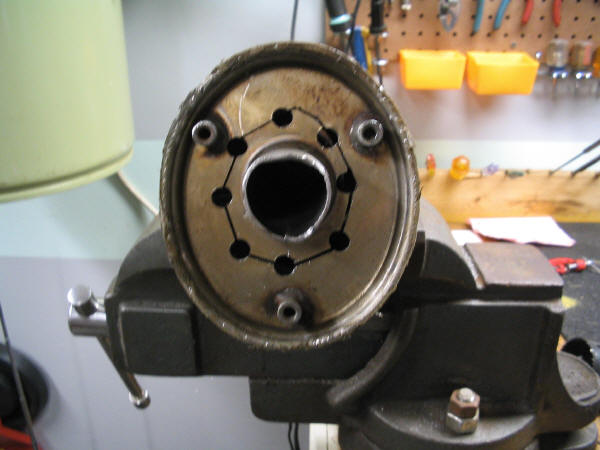
The rolled edge can be a bitch -watch me truggle